Budget Friendly Recommendations for Making Library Marketing Videos

Every Library Can Use the Power of Video for Storytelling and Strategic Marketing
Here Are my Updated Budget-Friendly Recommendations for Gear, Equipment, Apps and Software
These are updates to gear and tools that I have recommended in my many webinars and workshops on video basics over the last 5 years – keep checking back as I update my recommendations. Some things I loved in the past have disappeared (bye-bye easy-peasy Windows MovieMaker), and other tools have gotten too expensive unless you can score an educational or nonprofit discount (looking at you Animoto). I’m always looking for more cool tools to recommend so leave a comment or email me if you have a tool to checkout or for me to add to this list.
[Note: some of these are my referral or partner links and I may earn points, credit or a small commission if you buy via my link. BUT I will never recommend something I don’t believe in or haven’t checked out, I won’t recommend anything just for a commission, and you will never pay more via my links; you may even pay less. It all helps me get more cool tools to show you and help my library pals + clients.]First things first – you do NOT need to shoot live-action video to create a good library marketing video!
Many of the apps I recommend below are all about helping you create fun, engaging, library marketing videos with a purpose – fast, and without any filming or editing necessary. You don’t necessarily have to get a crew, convince your colleagues or patrons to appear on video, or anyone to learn lines or be an actor. I highly recommend your first steps with video for library marketing to be using the apps or software you already have first, or apps that let you create with text, still photos, or stock clips while you work on getting better at telling your library’s marketing story.
If you’re going to record some live-action, you will need some gear. Note: I don’t mean ‘live’ as in Facebook Live, Instagram Stories/IGTV, or YouTube Live – those are all cool and need some gear too – but I mean ‘live action’ as-in people appearing on camera, doing something, talking directly to the camera.
You need some basic gear or accessories to make better quality, higher engaging video, but the gear doesn’t need to break the bank!
There are 3 essential add-ons to your existing webcam, smartphone camera, or handheld camera: Audio, Stability (tripods), and Lighting. If you have to skip something, don’t worry as much about lighting (natural light through a window or a decent desk or floor lamp will do!), but definitely do NOT skip the audio.
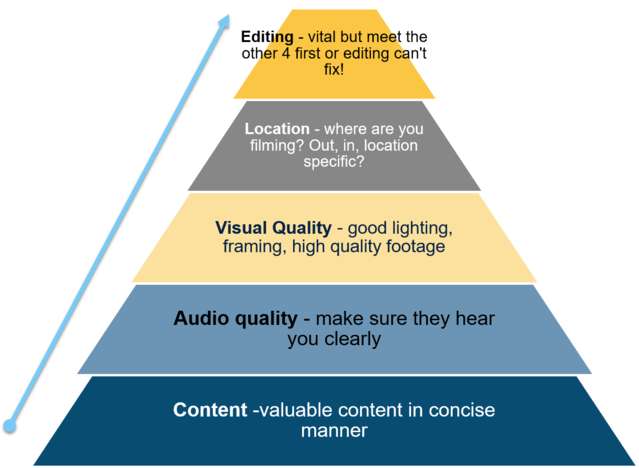
When I teach video workshops – no matter if you are shooting live-action or creating a video from still photos, text, animation, etc – there’s an order of priorities. I’ve taken to calling it the video “power pyramid”. You must start with a strong, clear, focused message -and then audio comes next. You can’t fix stuff during editing (at the top) that wasn’t there or wasn’t good to begin with – even a/v wizards and filmmakers can’t do it.
Audio – aka ‘Go Get a Mic!’
Believe it or not, but the key to good or great video – beyond having your content nice + focused, is to have crisp, clear audio. The data shows people will click away FAST if they can’t hear your video, when it’s the kind where you meant them to hear the dialogue or voice-overs. Viewers may forgive some iffy lighting or a little shake – but not crappy audio. So, get a microphone!
Yes – you can absolutely use the awesome camera built-in to most smartphones today! It records awesome pics and video! NO- you can’t use the mic built-in to that same smartphone, unless you’re recording just you and you’re within 12-24 inches of the device.
You can often get away with the earbuds w/ mic that you use with smartphones – I’ve long had success with the ones that have a traditional mini 3.5mm stereo-jack plug – I plug in to the input/output stereo jack on my laptop, in to my iPad, and with an adapter in to my newer smartphone.
If you are recording audio straight to a computer – video blogs, podcasts, voice-over slides, voice-overs added to animations or video footage
To plug in to your desktop/laptop – a USB mic offers plug-n-play ease, no extra software or gear necessary. One that offers a cardioid pickup pattern is ideal (especially if you will use it for 2-person interviews). A cardioid (heart-shaped) range controls for just picking up the noise in front of it – you – and eliminates unwanted noise from behind or sides. Omnidirectional mics (of any kind – including what’s built-in to your phone, webcam, laptop, DSLR) pick up any and all sound from all directions equally. That’s not good for getting crisp, clean audio of YOU. You can also search for ‘podcasting mic’ as these are designed to plug in to a computer vs. a sound board or camera.
Some of the best rated microphone brands include: Rode, AudioTechnica, Shure, Blue, Samson, MXL, and Heil. Some of these are pricier and more ‘pro’ brands.
Examples to Look for: Samson Q2U [$60] or Meteor [$60], Rode NT-USB [$169], the ATR2100 [$63] or AT2035 [$149] and the Blue Yeti [$105-140].
 I own a Blue Yeti (Blue is the brand) with desk stand and also a folding boom arm to mount it too – I prefer the larger Yeti [$105] vs. the Blue Snowball [$47], because the Yeti has full cardioid pickup and more settings. (Beware, some models of The Snowball are only omnidirectional)
I also own two AudioTechnica’s for use with my Canon DSLR for video at events – both were very economical: ATR1300 Unidirectional Dynamic hand mic [$25] (get an adapter to add the 3.5mm stereo jack) and the wired ATR lavalier mic (mine is a 3150 $25, no longer made), the newer model is ATR3350i [$29] (should work with smartphones as well as cameras).
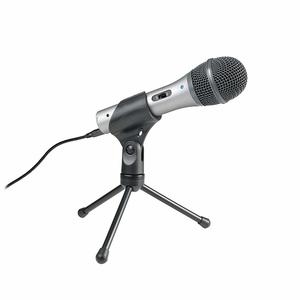 And I couldn’t help myself – after multiple good reviews (it’s a podcaster fave) and hearing its sound from several friends, I added the AudioTechnica ATR2100 USB Cardioid Dynamic mic to my stable of mics – it’s half the price of the Yeti ($63), smaller, and sounds really rich and clear!
If you are mostly using smartphones or tablets to capture video, look for inexpensive mics that clearly state they will work with smartphones (some mics require ‘phantom power’, which a smart device generally doesn’t provide). I bought some of these inexpensive ($9) MiracleSound lavaliere mics to give-away during my video workshops. See, there’s an audio option for every budget!
Stability – steady video is good video, use a tripod (even with your smartphone)
Small, table-top or desk-top tripods
Fotopro for smartphones w/ a Bluetooth remote– $11
Neewer 12in desktop, flexible tripod – for smartphones and small cameras – $20
Joby GorillPod 500 – perfect for smartphone, small point & shoot cameras (about 8in tall, similar to my 15yr old GorillaPod) – $26 [also models for smaller phones/cameras 325 series; midsize 1k series, and even for large DSLR cameras up to 11lbs $100]
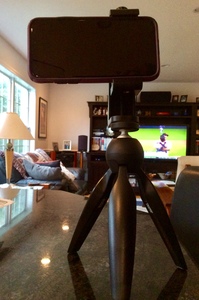 Manfrotto PIXI mini tripod – I recently upgraded my travel kit to include this awesome, study little tripod to hold my large, heavy smartphone. Manfrotto is a very well-known, established brand among professional photographers. This guy was a good deal – I paid $17.
Adapter mounts/clips to attach smartphones or tablets to a tripod
Joby GripTight (I’ve had the smaller one of these to carry around in my purse and backpack for many years) – XL mount for large smartphones (it’s still only 3in long) – $10
Neewer vertical bracket tripod mount– $10
Vastar universal cell phone tripod mount (adjustable) – $7 [Note: this one is for smaller phones/devices; my larger iPhone now needs this Vastar Universal Smartphone Adapter with Vertical + Horizontal clamp – still $7. Vastar also makes adapters and mounts that hold tablets.
Lighting – banish shadows and use some extra lights to make you look even better
You don’t have to worry about lighting nearly as much as audio, but it does matter. Harsh shadows are never your friend. Always make sure the light comes from in front or to the slight sides of the person on camera – positioned behind or to the side of the camera. Never have bright lights behind your subject – unless your video style is ‘witness protection program’ and you want your person to be in the dark. 😉
Natural light is the best! The sun is great – if it’s not directly overhead and super bright. Slightly cloudy days are actually very good for video, the light is softer and flatter. Sunlight filtered through windows is awesome. Make sure the window is front or to the side of what you are filming. 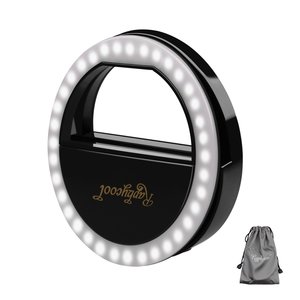
You can use the lights you have – even desk lights or standing lamps – if they help you get rid of shadows and provide even light. But sometimes we need to augment the lights we have and we can turn to inexpensive options.
Selfie Ring Lights – I love these small, cheap clip on ring lights that you can use with your laptop, smartphone, tablet, or even just hold them. I’ve purchased the following (an item I give away at events) and all are about equal: LimoStudio AGG1049v2 $7 (brand makes tons of inexpensive photo/video accessories), Whellen l184, $8, QIAYA Ring light $7, and RC Selfie Ring 36 light, $11.
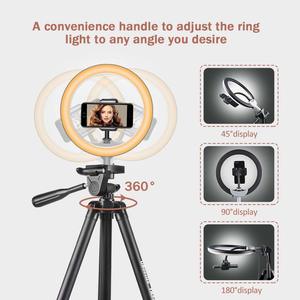 Desktop or floor-standing ring lights – I recently upgraded my office kit to include this UBeeSize 10” ring model (it came with yet another tripod, plus an adapter to hold a smartphone inside the center of the ring light. It’s adjustable for brightness and color tone (cool, warm, daylight-esque). My pro photog friends call this type of light a “beauty light” because it gives an overall glow, no harsh shadows anywhere on the face, and the cool, sparkle-in-the-eye effect.
I also have a larger (size of a small paperback) Neewer CN-160 LED Light panel that can attach to the hot-shoe on top of my Canon DSLR or to a tripod. It runs on batteries, is adjustable in brightness, and is perfect for when you may need to light up more than one person or you’re in a large space or further from the camera. $20-25
Bonus tip: buy some white foamboard and inexpensive plastic vice clamps and you have a cheap light reflector to use on tabletops, desks, or have someone hold it (instead of the clamps) – great to reflect light back on the other side of someone standing next to a window or light source.

Software/Apps for video editing and video creation
You need more than cool, inexpensive gear – you also need apps + tools to put your videos together. There are plenty of affordable and easy options.
Video Editing –
This kind of software takes your raw footage from cameras or smartphones and lets you trim unwanted bits, edit together clips taken at different times, add onscreen text and graphics, add audio or music, and even make some corrections to the footage you collected. There is a wide range of software out there in terms of features, complexity and price (I did a round-up of video editors a while back when I was looking for a replacement to the late Windows MoveMaker to recommend for those just starting out or with not much video experience.) The following are the two I still have on my own computer – I primarily use Filmora now:
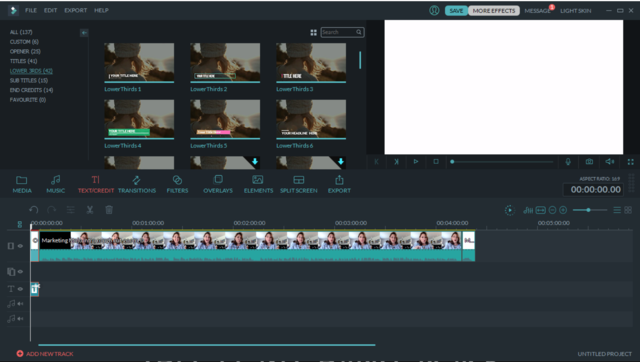
Filmora – full video editing software by Wondershare. Filmora is now (since 2018) my preferred, easy-to-learn software to download for your PC or Mac. It has a simple interface that allows for multi-track editing, plenty of built-in onscreen graphics (title cards, lower thirds, credits, etc), effects, and even a selection of simple audio/music tracks and sound effects. Even better – it’s a one-time payment, not a monthly subscription like all of Adobe’s products.
OpenShot – free, open-source, full video editing software. I used this for about a year and it has all the needed features to edit live-action video clips, add basic onscreen text and graphics, audio tracks, etc. But it’s a bit clunky and not as intuitive or easy to learn as other tools. But it’s free!
WeVideo – cloud-based, subscription video editing; when you’re in a hurry, don’t waste time learning super-powerful (kinda clunky) video-editing software – go online instead. WeVideo lets you upload and edit online, add transitions, simple effects and even collaborate with videos from friends or colleagues.
Video Creation
These tools are not full editors – and that’s the beauty! They let you create videos without needing to learn how to edit raw video footage. Use photos, text, animations, stock clips and create great videos in much less time.
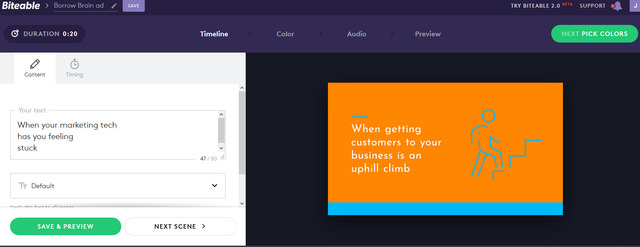
Biteable – cloud-based video animation and creation tool with templates to help you create videos without any editing skills. Comes with collection of animated scenes, live-action stock video clips, and live-action where you can insert your logo, your photo, and/or your text. Biteable’s templates make it easy to combine text, images, animations, and stock clips to for social media ready videos. Remember, not all useful marketing videos need to show you or your colleagues on-camera, or anyone at all! (Paid – yearly subscription, plans start at $20/mo)
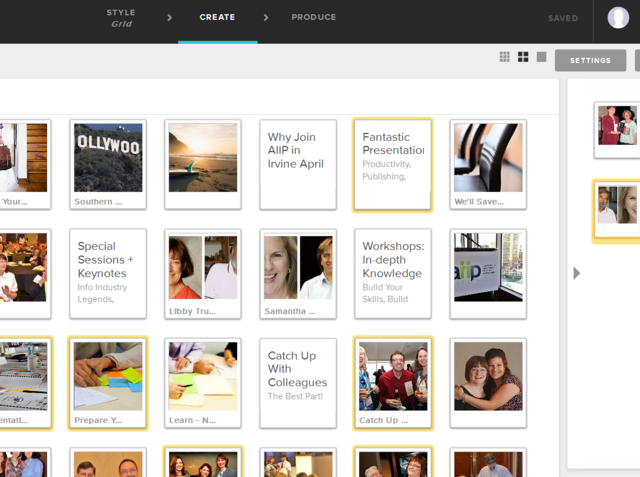
Animoto – another tool that lets you create videos with no full editing necessary; use their templates and algorithm ‘magic’ to turn still photos and short (pre-edited) clips into videos. Within each template you can’t control a lot, but it usually turns out gorgeous, plus has large built-in licensed library of music. There are two creators/editor options – the classic ‘memories’ options – a slickly animated video of mostly still photos, or their marketing videos creator with templates like ‘behind the scenes’, service promotion, explainer, etc. [Note: I used to recommend this tool more but they kept raising the prices – e.g. the pro plan where you can finally take their logo off and get 1080p HD is now close to $400/yr! I think there are lots of other video tools out there – but if you can get this at a free or low-cost education or nonprofit plan it’s a good tool]
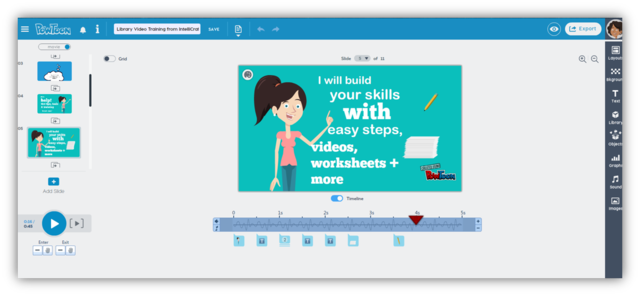
PowToon– cloud-based animation software; create 2D animations or whiteboard drawings to illustrate a presentation, story or video for social sharing. Easy to use. (limited free plan- 3min video w/ their watermark, limited templates; more options on paid plans, Pro starts at $19/mo; PowToon offers several educational plans that are affordable)
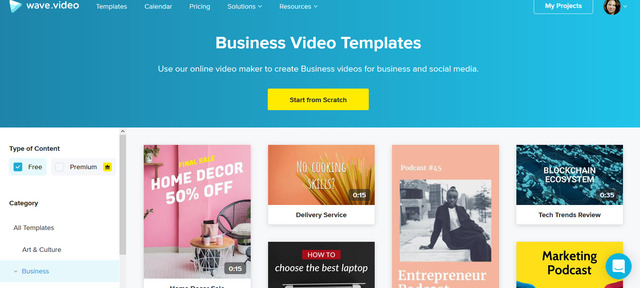
Wave – cloud-based social-friendly video creation tool; use their templates to add text to photos or short clips (including some of the free stock comes with Wave – some free some low-cost). Perfectly size your videos for the various social platforms. Wave has a good blog and publishes a calendar with suggestions for social-friendly videos every month. (limited free plan = 15 seconds, share direct to social media, no download; paid plans start at $8.25/mo and feature longer videos, more tools, more graphics and you can download and reuse the video elsewhere)
Ripl – an app for your smartphone plus browser; create short, social-friendly videos; free plan has limited templates and options. (limited free plan = 10 designs, 30 second videos, 8 of your own photos, only 3 music tracks; Paid plans start at $15/mo with more features, more music, more templates, longer videos)
Lumen5 – cloud-based app pulls in text from blog posts or that you copy to it, and it helps you create a matching video (e.g. your blog post headers turn to new ‘scenes’ with onscreen text). Uses a mix of stock photos and clips plus onscreen text to create short, social-friendly videos. (limited free version, paid plans unlock more features and longer videos)

SocialStudio from Pond5 – a social-friendly video creation app from the stock source Pond5, Upload your photos, use their stock, their templates, add text, and quickly create marketing videos. A fairly new tool and has one of lower paid plans – starting at $3.50/mo but you can try it for free.
Screencasting –
Jing – from TechSmith, is the baby sibling of Snagit. It does static screen grabs and video screen captures up to 5 minutes for FREE. You can upload to Flickr, YouTube or a ScreenCast.com account (as well as local download). For short demos, answering questions, or creating a short screenshare for sharing to social, Jing’s a good option. You want short videos anyway!
Screencast-o-matic – simple to use screencast software with free and cheap options. The interface and website have gotten slicker over the years, but the tool remains simple and cheap. Paid plans start at $1.50/month and let you record for more than 15 minutes (the free plan limit), publish straight to Drive, Dropbox or Vimeo, add text, music, animated transitions, remove the company’s watermark, and other real video features. There are also Education plans.
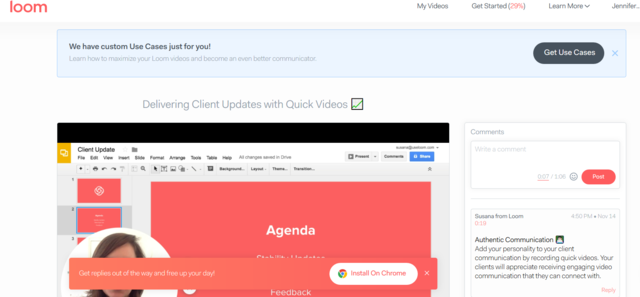
Loom – a newer, free, Chome-only browser extension for easy video screen-casting. You can capture yourself only, screen only, or both and then share to email or social media in one click. Use examples include software/app demos and walkthroughs, communicating with team members, and quickly answering and building a library of FAQs. You can even create and share videos directly from your Gmail inbox!
I also personally use my Zoom web/video conferencing app for doing screen share videos – because it’s just so darn easy and I have the app open almost every day.
BONUS TIP: Don’t forget – you can create a simple presentation in PowerPoint, simple text and graphics – this is one time it’s ok to turn on the animations feature – and then Export As a video! You can even record a voice-over or add an audio track before you hit Export As. BOOM! Easiest video creation tool ever! [I’ll probably do a quick tutorial video and post all about this one! Check back!]
Stock Sources – for photos, video clips, audio
VIDEO
Dissolve – modern, artistic, curated, high-quality yet affordable royalty-free video stock footage, as well as stock photos; you won’t find most of this material on other sites. They offer extensive, free research help for video projects, free low-res comps of any video clips, good tips and tutorials. Video clips from $29 each.
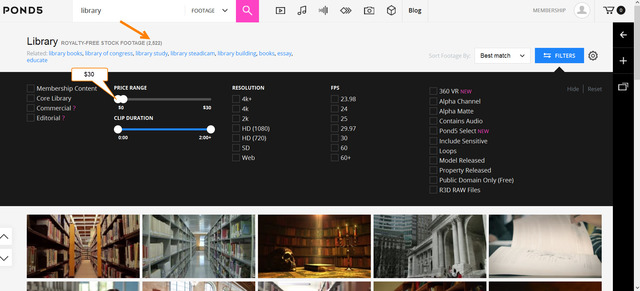
Pond5 – very affordable, easy to search and filter (inc. faceted searching) high-definition royalty-free video stock (e.g. more than 2000 video clips for $30 or less on term “library”). Also sells photos, sound effects, and music. Subscribe to their email list and get tips, tutorials, and a free high-def video clip each week.
Pixabay – the photo and clip art source for CreativeCommons0 images also has some video clips that are free to use. The images are well-tagged and easy to search and filter, though not always of the highest quality or most unique photographic style.
Video Hive – stock video footage; from Envato Market
XStock Video – all footage free to use in any free videos (inc promotional, educational, YouTube videos); lower resolution, short clips, and a bit random in what’s available – but potential source for b-roll or to add to a presentation or in-house project.
AUDIO – many of the royalty-free, stock photo sites also have stock audio
YouTube Audio Library – [go to Creator Studio > Create > Audio Library in your account] Music that is clear to use in your videos, which you can sort by genre, mood, instrument or duration.
AudioJungle – higher quality royalty-free stock music and sound effects in range of genres, styles; search or browse; from Envato Market (company also has brands that sell web themes, graphics, photos, etc). Audio clips range $1-39 each, $19 on avg.
FreeSound – free to use sound effects, music; WAV and MP3 files; search or check tags for style, mood, genre. Work available under Creative Commons license.
Premium Beat – audio stock, effects, royalty-free, exclusive to PremiumBeat; browse by genre (e.g. pop, latin, vocals, corporate, trailers, film scores) or by common use (e.g. logo stings, documentary, news, podcast, weddings, sports) or by mood (e.g. aggressive, funny, gentle, patriotic, mystical, etc) ; safe to use on YouTube, Vimeo, other video sites; based in Canada, may have a ‘foreign transaction fee’; avg price $49/clip
SoundBible – free effects, clips, sound bites; royalty free, public domain via Creative Commons license Blog posts include tips on how to use sound effects.
FreeStockMusic – requires email signup; completely free to use; somewhat limited selection. From AudioBlocks (and sister company VideoBlocks), which sells audio stock subscriptions.
Incompetech – stock, royalty-free audio source; beware all the ads and poor layout of this site!
PHOTO (may also have video)
Unsplash – Creative Commons CC0; a side project started by artists, designers and photographers years ago has grown to be one of largest free photo sites (with some of the most gorgeous in my opinion!). Tagging and metadata here is still a little lacking, but the quality makes up for it.
Pexels – curates CC0 photos from other places on the web – about 30,000 in results right now. Photographers can also contribute directly to site.
StockSnap.io – Creative Commons CC0; curates photos from around the web and from selected photographers in their network (some photos have come from other sites, like Unsplash). All photographers are identified with each picture. From Snappa, a cloud-based graphic design tool based in Canada.
WoC In Tech Stock – Women of Color in Technology stock photo collection; finally, a set of photos to show the full representation of women in all aspects of technology work. Available under CC (Attribution) license.
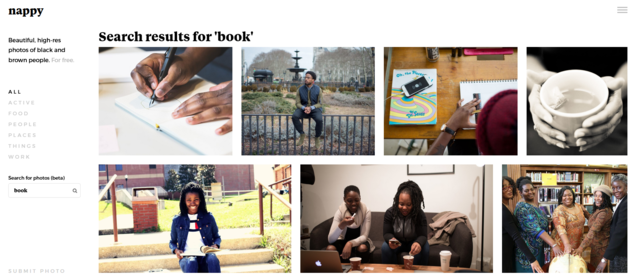
Nappy.co – gorgeous stock photos featuring people of color
I list other photo sources here in my recommendations and I wrote a post to answer questions from a library colleague about using images for library marketing.
I hope these tools and tips show that there are plenty of budget-friendly options to fit every library budget and make video accessible and easy to add to your marketing tool kit. Contact me for more info if you want me to do a webinar or hands-on workshop about video for your library or library system!